
 Photoshop
 Maya
Maya ZBrush
 Houdini
 Unreal Engine
 Substance Painter
 Blender
 Nuke
Nuke Arnold
 KeyShot
 V-Ray
V-Ray Substance Designer
 Mari
Mari Marvelous Designer
 Marmoset Toolbag
 3ds Max
 3DCoat
 Redshift
 After Effects
 Faceform Wrap
 Lightroom
 OctaneRender
 SpeedTree
 Daz 3D
 Agisoft Metashape
 Fusion
 Modo
Modo RealityCapture
 Gaea
Gaea Cinema 4D
 Gravity Sketch
 Premiere
 Procreate
 Substance 3D Modeler
 Katana
 Mudbox
 Krita
Krita World Creator
 Yeti
Yeti Ziva VFX
 SketchBook
 Quixel DDO
 Mixamo
 Natron
 Quixel Bridge
 Quixel Megascans
 Adobe Medium
 Quixel Mixer
 SynthEyes
 Clip Studio Paint
 SketchUp
 Unity
Unity Gaffer
 Massive
 Materialize
 Ornatrix
 PreForm
 Corel Painter
 Moi 3D
 QuickTime
 Storyboard Pro
 TreeIt
 animBot
 ReCap
ReCap Meshmixer
 DaVinci Resolve
 World Machine
 xNormal



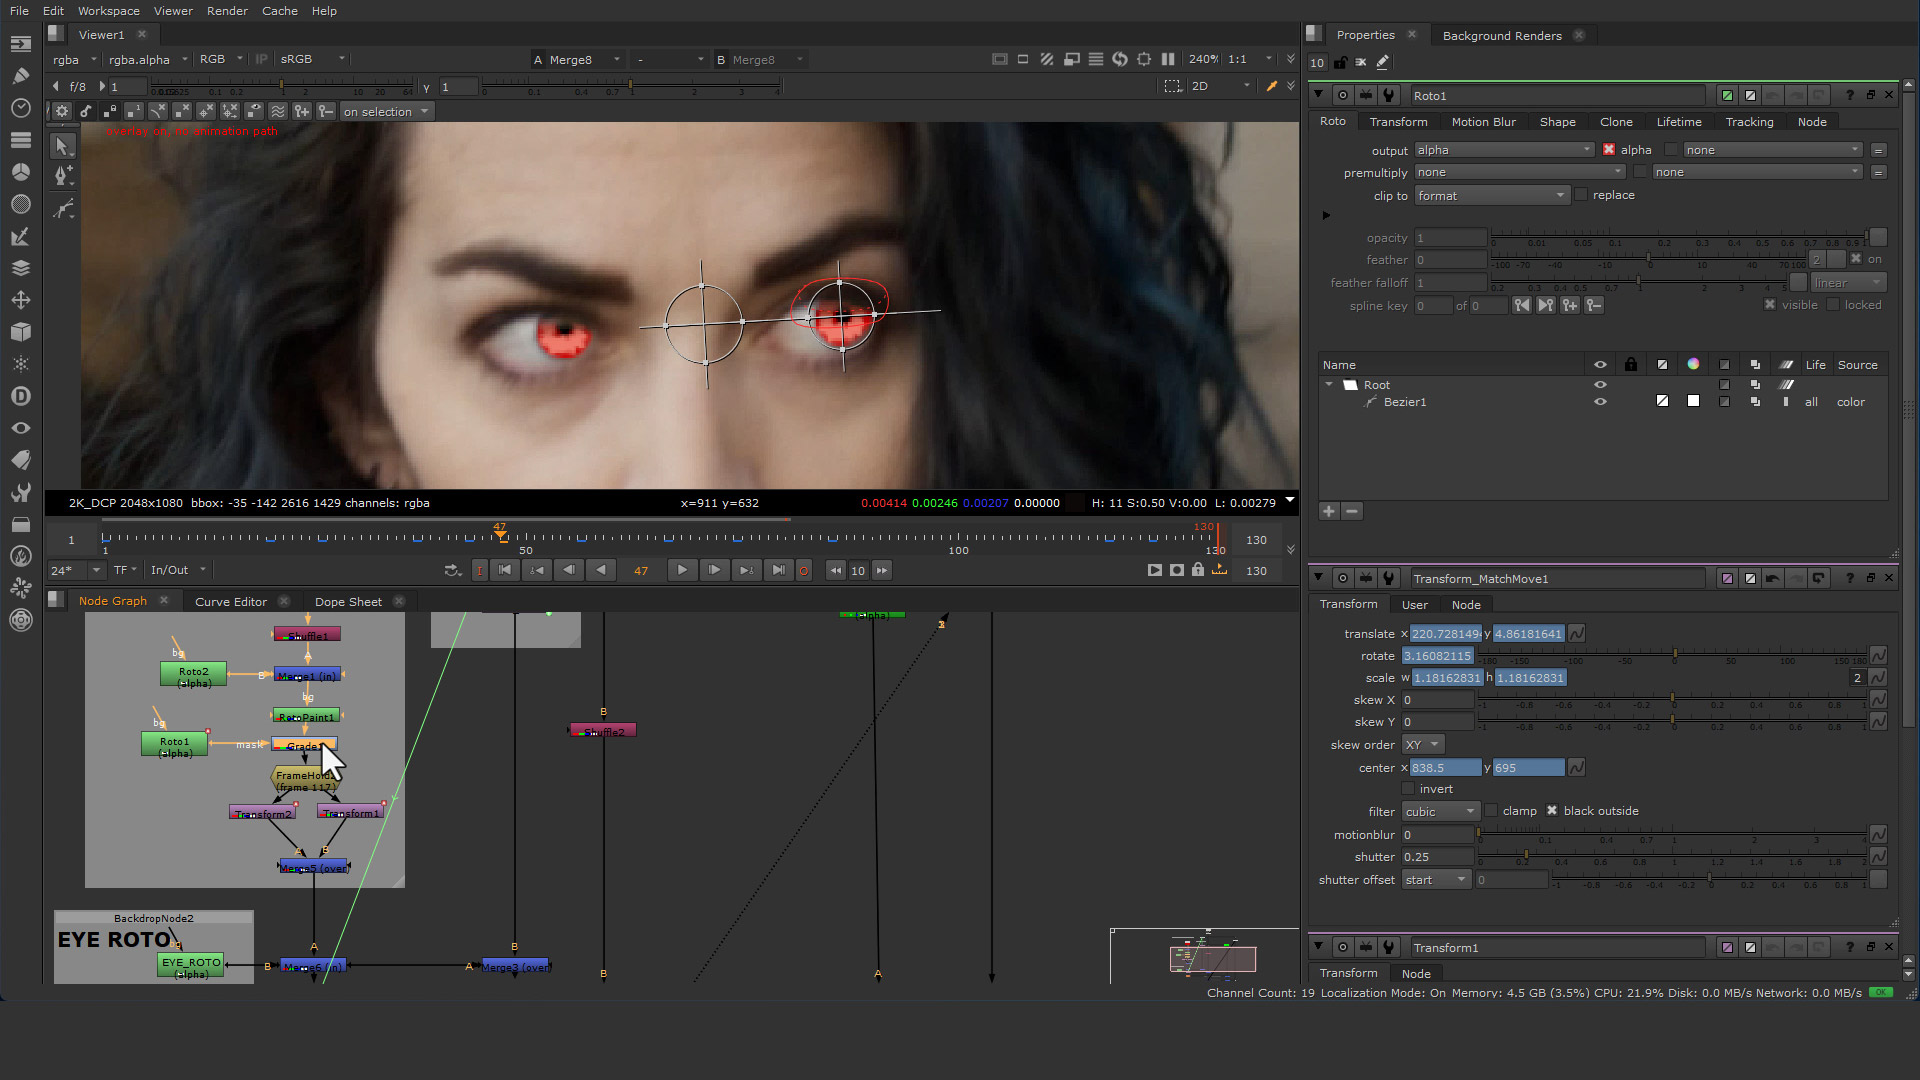


In this compositing workshop, VFX Artist Zachary Goodson covers some of the basic and fundamental needs and tools used when creating fast-paced visual effects for film and television. Over seven lessons, he tackles professional 2D tracking, stabilizing, and rotoscoping for a 2D eye-glow effect. This exact method taught in this workshop was the same workflow used to create glowing eye effects in production. The following shot featured in the workshop is a painted-out sign replacement, which is a very common requirement in visual effects for film and TV.
Artists are often asked to remove logos for copyright issues, or to even insert logos and brands that pay to be advertised in specific shows. Zachary reveals how professional artists handle a 3D camera track using SynthEyes. This includes how to 2D-track points in SynthEyes for a solid and accurate camera solve, how to place planes in the 3D scene for compositing in Nuke, and how to prep the export for Nuke. After exporting, he shows how to use the 3D camera to stabilize, prep, and clean-plate a shot, including adding multiple sign replacements. He teaches all the paint-outs and sign replacements using only one camera track and one giant 3D scanline patch in Nuke.
The techniques, tips, and methods featured in this workshop are widely used in visual effects for film and TV. They are fast, efficient, and great for getting a shot done under a tight deadline. All working Nuke files, SynthEyes files, PNG logo elements, and plate footage are included as downloadable project files for further practice and to help artists follow along with the lessons.
7 Lessons
In the first lesson, Zachary introduces the workshop before moving on to the first part of the eye-glow process. His workflow starts with 2D tracking of each eye using Nuke’s 2D Tracker. He then moves on using Nuke's roto nodes to rotoscope each eye and prep it for overall compositing work and the final eye-glow effect.
Duration: 26m 46s

In this lesson, Zachary covers the second part of the eye-glow effect. His process covers compositing, color correction, and addressing motion blur issues that can arise during compositing. He also goes over using a roto shape to create a gradient on the 2D eye, resulting in a much more realistic effect. He also shows how to use Luma Key to merge back in specular highlights from the original plate.
Duration: 25m 26s

In this first 3D Tracking lesson, Zachary presents Part 1 of tracking a shot in SynthEyes. He begins by teaching how to import footage into SynthEyes, before moving on to the tedious but critical process of 2D tracking points in the shot. He also covers the key points to look out for, how to track them consistently in 2D, and what to do when your trackers stray.
Duration: 23m 50s

In this lesson, Zachary moves on to Part 2 of 3D shot tracking in SynthEyes. He continues from where he left off in the previous lesson, with all 2D tracker points completed, and proceeds to reveal how to solve the shot. From there, he goes over editing camera curves to achieve the best camera results. To finish up, he shows how to orient and scale the scene for export to Nuke for compositing.
Duration: 31m 8s

In this next Nuke lesson, Zachary goes over how to import a 3D track from SynthEyes into Nuke. He starts by bringing the 3D camera into Nuke before revealing the best ways to use the 3D track. He then covers his Nuke setup for the track in a mindful way to most efficiently speed up plate prep, paint-outs, and sign-replacement tasks.
Duration: 25m 56s

In this lesson, Zachary shares how to best utilize the 3D track to help streamline the paint-out process. He goes over how to use Nuke's projection nodes and UV scanline rendering mode, and how to use these tools to minimize tracking and roto work. He reveals why artists do this: to complete paint-outs and sign replacements as fast and efficiently as possible.
Duration: 27m 51s

In this final lesson, he shows how to utilize the 3D track to add the new sign replacements on top of the existing paint-out and sign removals. He goes over using 3D geometry in scene editing, placing 3D cards, color correcting, and color matching the existing plate to create the new signage. He shows how to do this without having to over-edit or over-comp the existing shot. All of this is done using the same roto track and setup as in the previous lessons for maximum efficiency.
Duration: 27m 51s

Primary tools
For this workshop you’ll need:
Project Files
When you download the project files accompanying this workshop, you'll get access to Zachary’s working files. Inside, you'll find:
- Nuke file containing the complete eye-glow comp.
- Nuke file containing the complete sign-replacement comp with 3D camera export built in.
- MP4 of the eye-glow footage.
- MP4 of the sign-replacement footage.
- PNG of the logo used for the sign-replacement comp.
- SynthEyes .sni tracking file with the completed 3D camera track.
- Resources file (.txt) — containing links to the footage used for the eye glow effects and sign replacement
Skills Covered
Who’s this Workshop for?
This workshop is aimed at anyone interested in learning how to effectively create fast-paced visual effects for TV and film. Artists will learn to use 2D and 3D tracking techniques to streamline compositing and visual effects workflows.
Zachary provides tips and tricks that can be learned and utilized by artists ranging from the most novice to the most advanced seasoned VFX artists. Whether you’re a beginner or an expert, there is always something to learn.
Learning Outcomes
By completing this workshop, artists will have developed a comprehensive understanding of the basic tasks required to create fast-paced visual effects for television.
Key skills include:
- How to create a 2D eye-glow effect in Nuke
- How to 3D track a camera in SynthEyes
- How to 2D track in Nuke
- How to utilize a 3D track for paint-outs
- How to create multiple sign replacements using one 3D track
- How to do roto for an eye-glow effect
- How to use 3D and 2D tracks to stabilize footage


